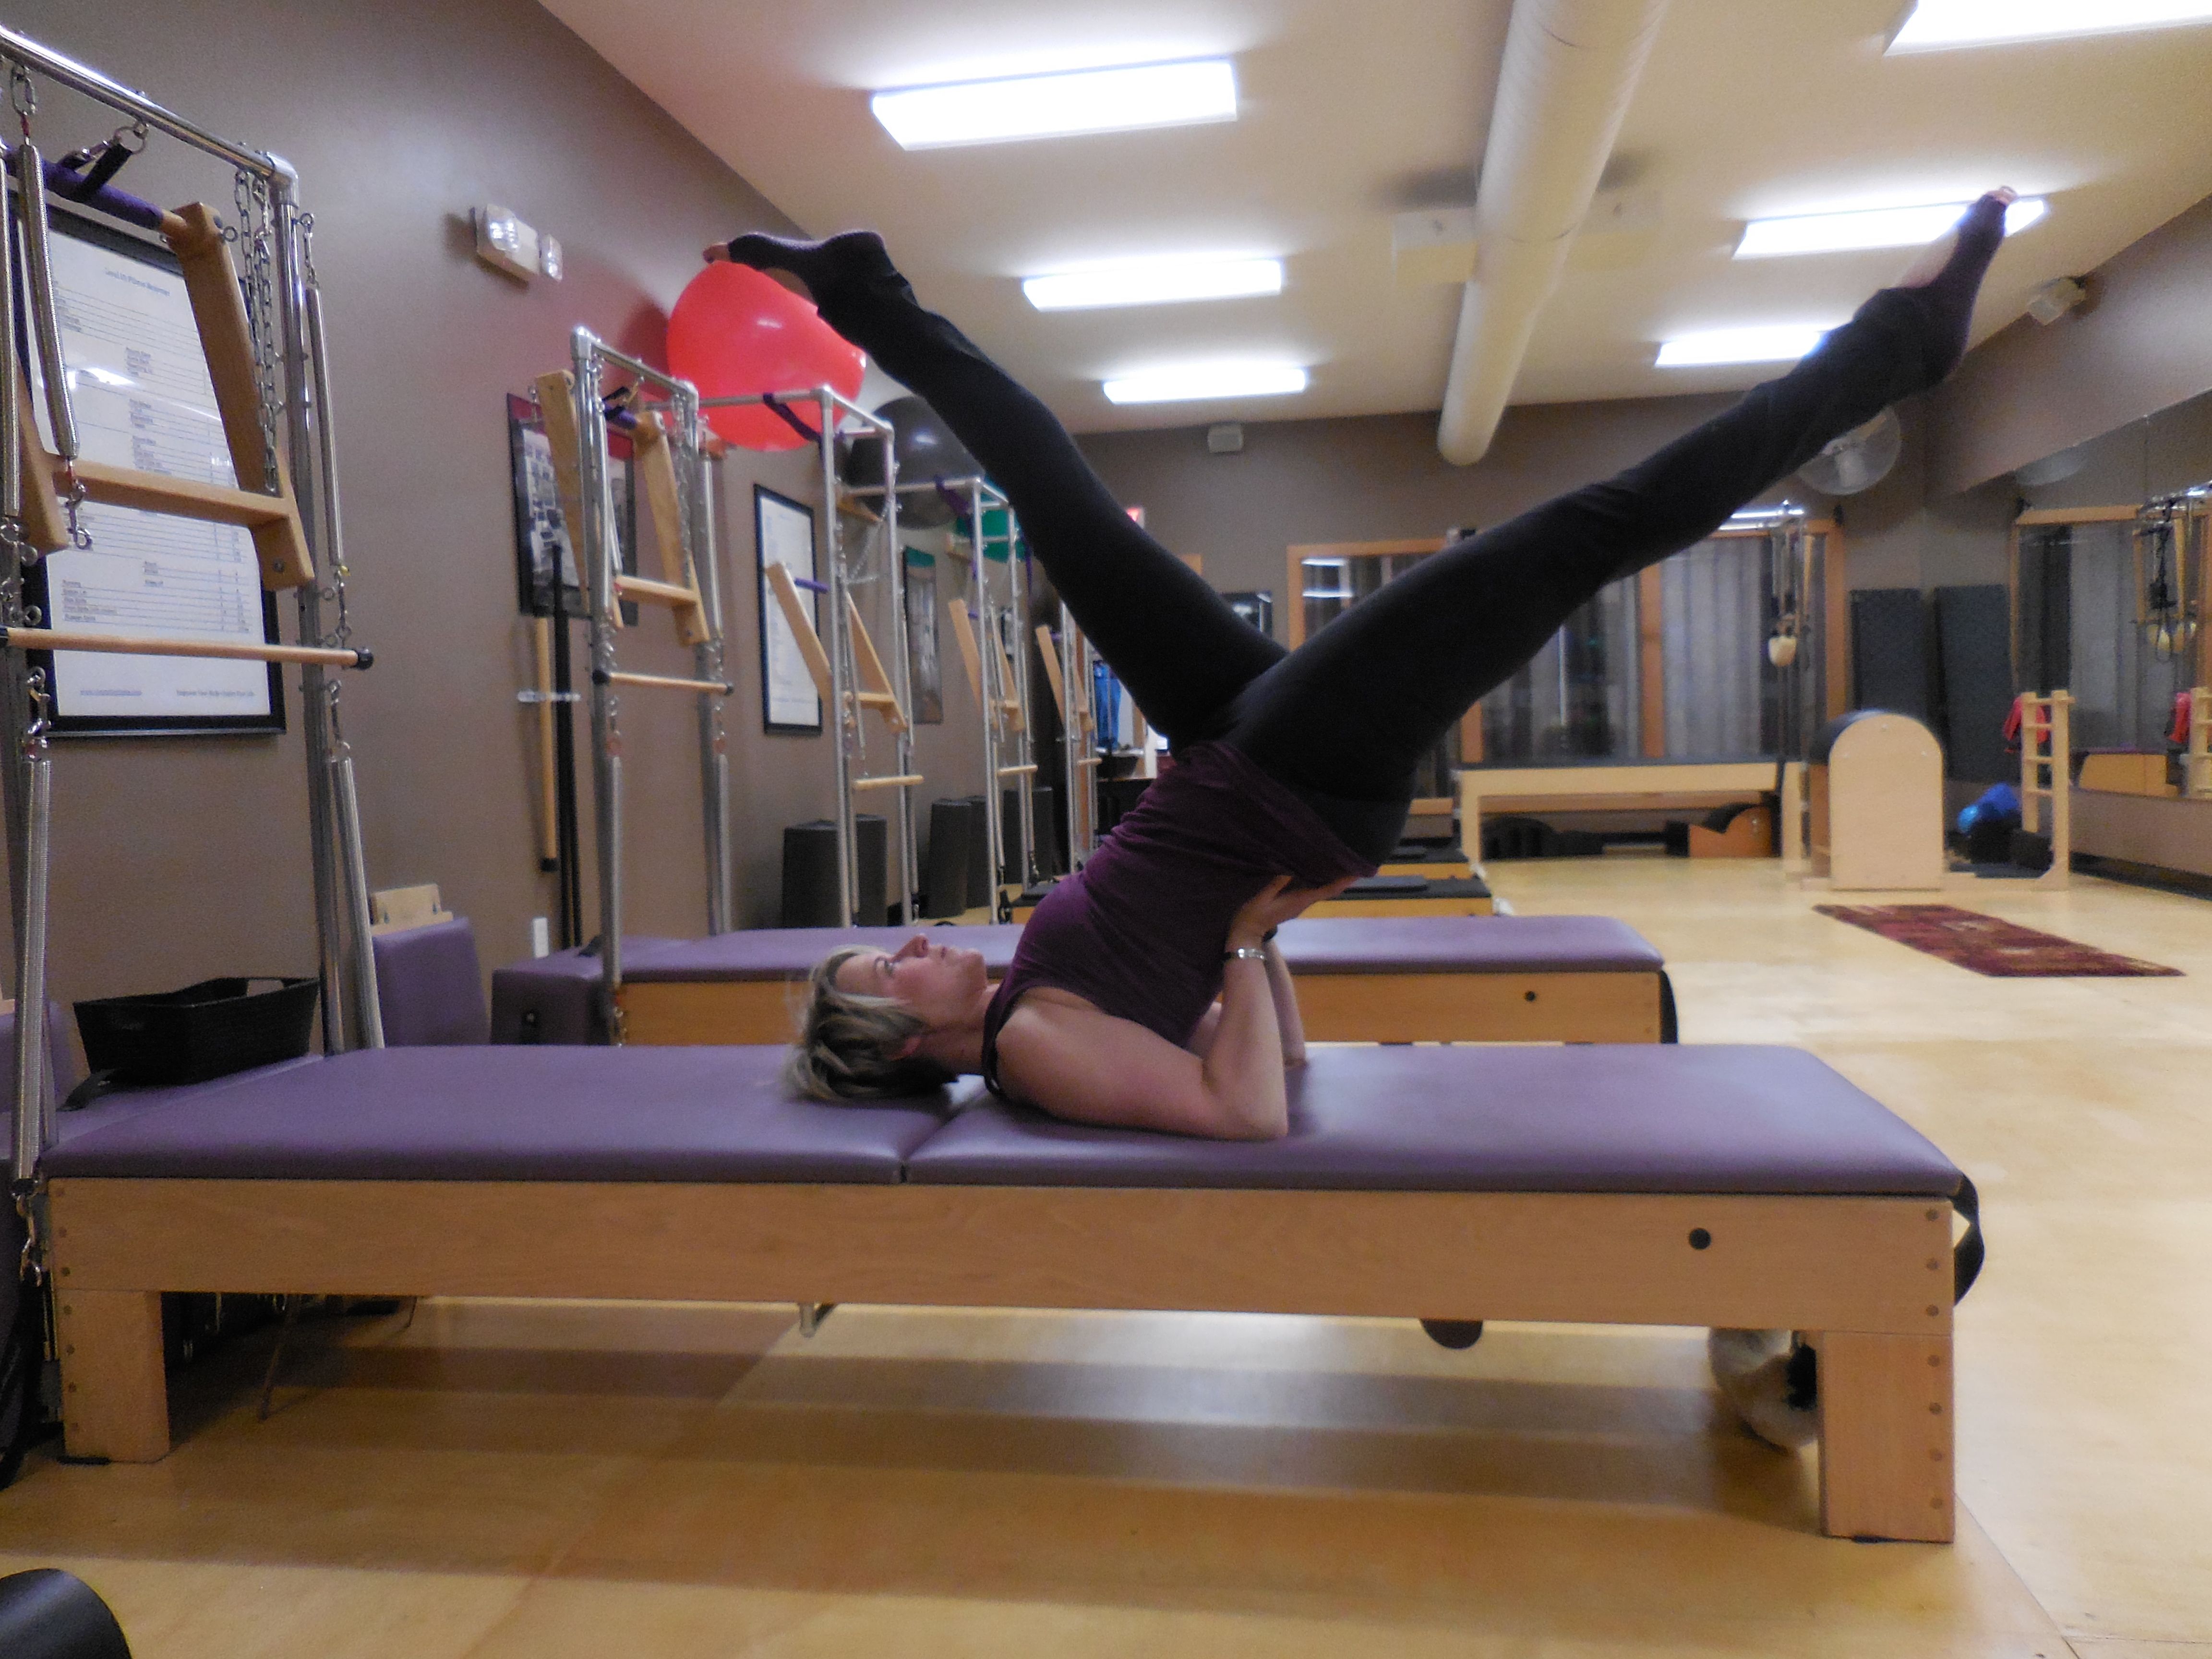
The Pilates Scissors and Bicycle mat exercises are quite challenging in their fullest form and really require that you have first progressed through skills learned in many of the other mat exercises. Even if you are not quite ready to lift the hips off the mat and support yourself to do the scissor and bicycle movements, there are plenty of great variations that can help you build the strength, flexibility and balance in your body to get there. On of my favorite variations is utilizing the Pilates Spine Corrector Barrel as a prop under the hips. The Spine Corrector Barrel allows you to still engage, work and strengthen the correct muscles without straining!
https://rivercitypilates.com/wp-content/uploads/2016/03/scissors-pic.jpg34564608Careyhttp://rivercitypilates.com/wp-content/uploads/2023/06/website-cover-name.jpgCarey2016-03-16 07:25:442016-03-16 07:22:23March Matness 2016: #scissors and #bicycle
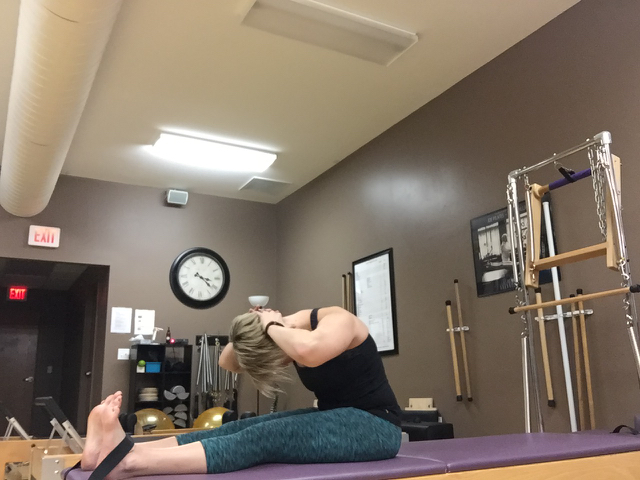
An exercise called Neck Pull sounds kind of scary – right? I agree but I can see where Joe thought the name fit the exercise. The Neck Pull exercise really combines the Roll Up, the Spine Stretch, and an added focus on lengthening(or pulling?) your neck. I don’t especially love the “Pull” part of the name because it immediately makes me think of yanking or pulling on your neck which is not what we want. Ideally the palms of the hands are putting just a slight pressure on the base of the skull that feels like you are creating length or tractioning the head away from the shoulders. This lengthening of our neck really creates a sense of whole body work that engages us from the soles of our feet to the crown of our head.
Of course taking the hands behind the head like this also makes the exercise more challenging than just reaching arms in front of us like we do in Roll Up. The Neck Pull exercise also challenges your core muscles by moving in a flat back spine for a portion of your getting your spine to the mat.
Tip: If you find yourself jerking or trying to muscle through rolling up from the mat with your hands behind your head, use the arms reaching forward position during the roll up portion of the exercise. You can place the hands behind the head before your roll up to your tall spine. This will allow you to work on lengthening and strengthening the neck and core muscles on the first half of the exercise so you can eventually progress to keeping them behind your head the whole time.
The Pilates Double Leg Kick is kind of like the One Leg Kick and Swan put together! Just like in the One Leg Kick you are trying to stabilize your body and specifically your hips as you do 3 snap-kicks toward your buttocks. Then lift into your swan with hands either clasped behind you or stretched long beside you. When we look at the progression of the Pilates Mat exercises we can see how this exercise takes movements and concepts we’ve done previously and adds in coordination of those movements to make it a bit more challenging.
Here’s the basics of the exercise:
Set up for the exercise by laying on your chest with your head turned to one side. Overlap the palms and slide them up your back letting your elbows drape toward the floor.
Stabilize your body by drawing your abdominals up and in and gently pressing your thighs and hips into the mat. (this should be some work!)
On an exhale, do three controlled snap-kicks toward your buttocks maintaining your hips stable
On your inhale you can either reach your arms beside your body or possibly grasp your hands together as you articulate away from the mat into a swan position. If it feels OK on your low back you can lift the feet away from the floor (Otherwise you can just leave your feet on the mat)
Exhale as you go to the 3 snap-kicks stabilizing your upper body to the mat
Joseph Pilates suggests repeating 5 times in Return to Life.
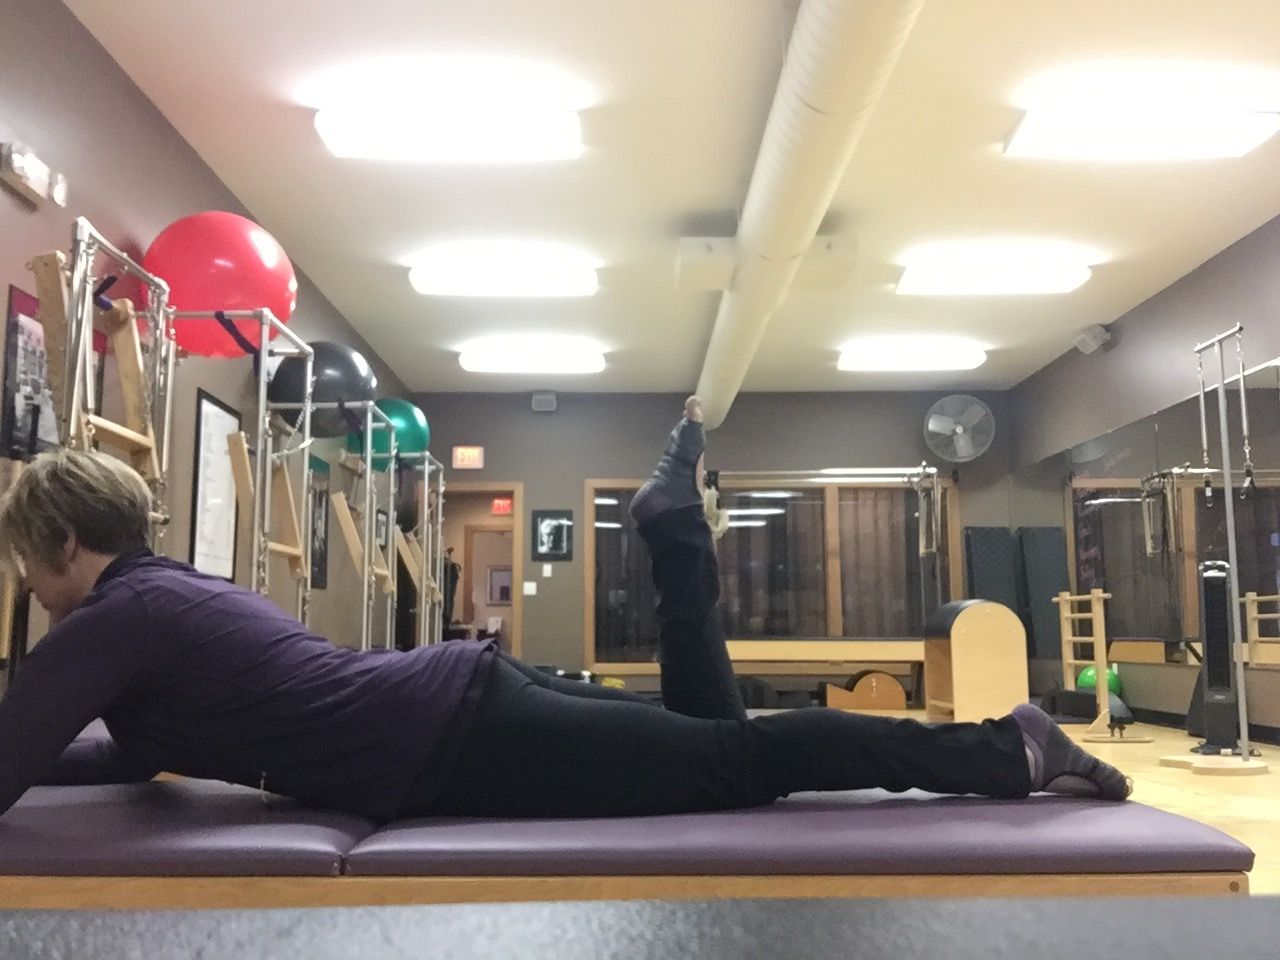
The One Leg Kick exercise is another one of those Pilates exercises that seems pretty simple. You just lay on your belly propped up on you elbows (kind of like when you were a kid watching cartoons) and try to kick your butt with your foot right? If you find this exercise easy or maybe just “don’t get it”… try what I like to call Picky Pilates. Read through the following tips below and try to incorporate ALL of them as you coordinate your breath and movement to practice!
Getting set up The start position of this exercise should feel like work! If it’s not then there is no use even starting to add the movement in! Take your elbows out in front of your elbows, slight press your fists into the mat and find the feeling of gently pulling yourself through your arms (I always think of someone doing an army crawl, pulling themselves forward). Your legs should be gently squeezing together and stretching away from your hips so much that maybe your toes and even knees are starting to lift away from the floor. If actually having your feet and knees lift slightly doesn’t feel good on your back you don’t need to lift them but try to find the feeling of reaching through them so much they could lift off! Your abdominal muscles should be working like crazy in this position pulling away from the floor and helping you find a position that feels stable and supported ( ie your low back does not hurt!)
Practice holding the position first. The start position of this exercise is really a lot of work so feel free to just work on finding it and holding it as you breathe as a prep for the full exercise!
When you’re ready to add in the movement here’s what you’ll do: Keeping the non-moving leg reaching and still, the other leg will do a snap-kick (a quick double kick) toward you buttocks. During this snap-kick the work of the exercise is to not change your body position AT ALL. You can do this by gently pressing your thighs and hips toward the floor to stabilize. This snap-kick while stabilizing will work your hamstring and glute muscles( butt and back of the legs) and give you a stretch in your front thigh muscles.
Breathe and Repetitions: Eventually you can work towards 6 to 8 repetitions on each leg. You can inhale as you snap-kick one leg and then exhale as you snap-kick the other.
https://rivercitypilates.com/wp-content/uploads/2016/03/oneleg-kick.jpg9601280Careyhttp://rivercitypilates.com/wp-content/uploads/2023/06/website-cover-name.jpgCarey2016-03-13 03:30:002016-03-13 14:26:04March Matness 2016: One Leg Kick
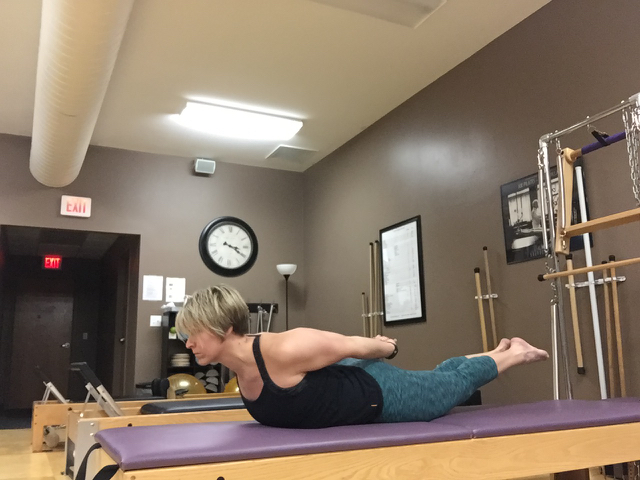
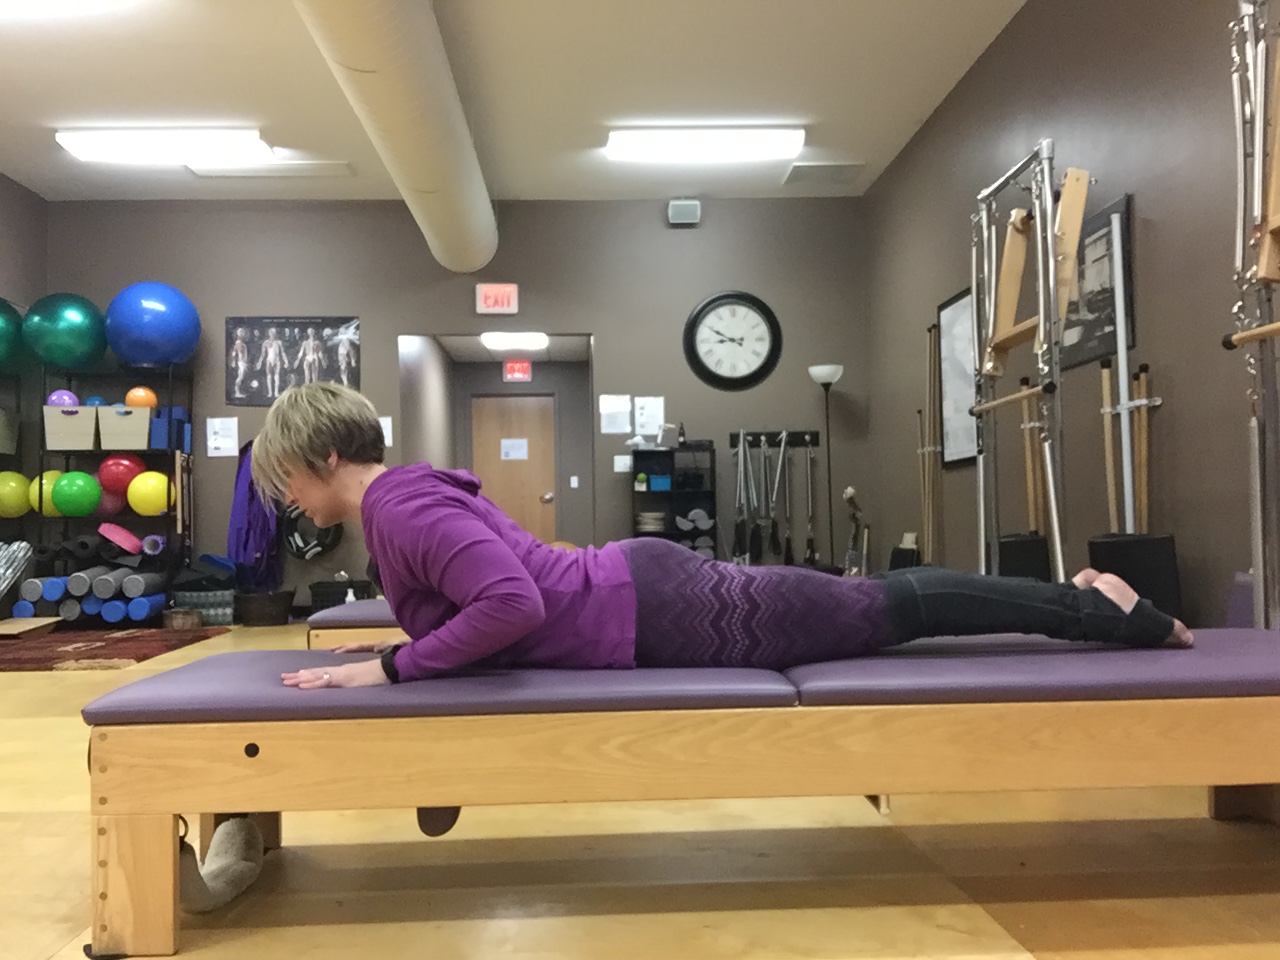
The Pilates Swan and Swan Dive exercises are the first extension exercises in the Pilates mat order. In previous exercises we lay on our backs and curl the spine forward off the mat rolling through our spine vertebrae by vertebrae. You can think of swan as a reverse roll up. We are still trying to articulate and roll through our spine but now we are starting lying on our front side!
If the Swan exercises are not your favorites- you are not the only one. The Swan can be very challenging for lots of reason. For many people who spend their days sitting and maybe slouched over at a computer this exercise is hard because our bodies are not accustomed to bending in this direction. All that sitting and poor posture can cause tight hamstrings, low backs, necks and upper back. If this is the case for you know that even though it’s challenging for you Swan is actually a really great exercise for you! (Remember the things that are hard for us are often what our bodies need most!) I would even recommend trying to do Swan variations throughout your day. I included an Office Pilates version of Swan that is great to do just about anywhere!!
Here’s a few tips for your Pilates Swan:
Try not to “muscle through” this exercise. Just pushing your upper body up with your arms is not what the exercise is all about. Try to slowly roll up off of the mat and be sure to only go to a place where you are not straining. It should feel like work and a stretch but not painful in your low back.
Focus on lengthening and decompressing as you roll up from the mat. By drawing your abdominal muscles up and in away from the mat you will create a feeling of length through your whole spine.
https://rivercitypilates.com/wp-content/uploads/2016/03/IMG_6580.jpg9601280Careyhttp://rivercitypilates.com/wp-content/uploads/2023/06/website-cover-name.jpgCarey2016-03-12 08:00:112016-03-12 07:03:37March Matness 2016: Swan and Swan Dive
Like so many of our Pilates exercises, the Pilates Saw builds upon exercises that come before it in the Pilates Mat sequence of exercises. The Saw is essentially Spine Stretch with rotation. Just like the Spine Stretch exercise we are trying to anchor our hips and legs as we articulate through the spine. The key to finding the stretch and the deep abdominal work in this exercise might surprise you as it doesn’t just come from the upper half of our body. Our legs and hips have to really work to anchor our lower body into place so that our core muscles can properly rotate and roll down through our spine away from them hence creating the work. Here’s a few tips to help you find the “work” of the Pilates Saw exercise:
Make sure you can start in a tall spine and you are sitting up on your “sitting bones” of the pelvis. If your low back or hamstrings are tight you may need to bend you knees or even sit on a block or roller to elevate your hips to find the correct start position
Focus on anchoring you legs and hips into place and only rotate and articulate as far as you can do so without moving or shifting through your hips and legs. (This might not seem like a very big movement at first- that’s ok!)
Use an exhale to help you rotate and articulate and wring out the breath into a deeper twist. This will help you activate your deep abdominal muscles and specifically those oblique muscles.